How to use ImprovMX SMTP with Thunderbird
Using ImprovMX SMTP in Thunderbird is quite easy. You'll need to configure just two settings: the SMTP (outgoing) server and an identity for use with your alias (alias@yourdomain.com). Follow these steps to get started!
1 ) Generate your SMTP user in the ImprovMX dashboard at app.improvmx.com.
Click the settings cogwheel next to your domain name, and then select SMTP Credentials.
Fill in the username (alias) and create a password. Save this password for use with future steps.

2 ) Add the SMTP (outgoing) server to Thunderbird.
Open Thunderbird and head into your account settings: Tools -> Account Settings.
On the left hand sidebar, select the Outgoing Server (SMTP) tab and then click the Add button.
Fill in the SMTP Server settings as follows and click "OK":
Description | Anything you wish |
Server Name | smtp.improvmx.com |
Port | 587 or 465 |
Connection security | If 587 STARTTLS |
Authentication method | Normal password |
User Name |

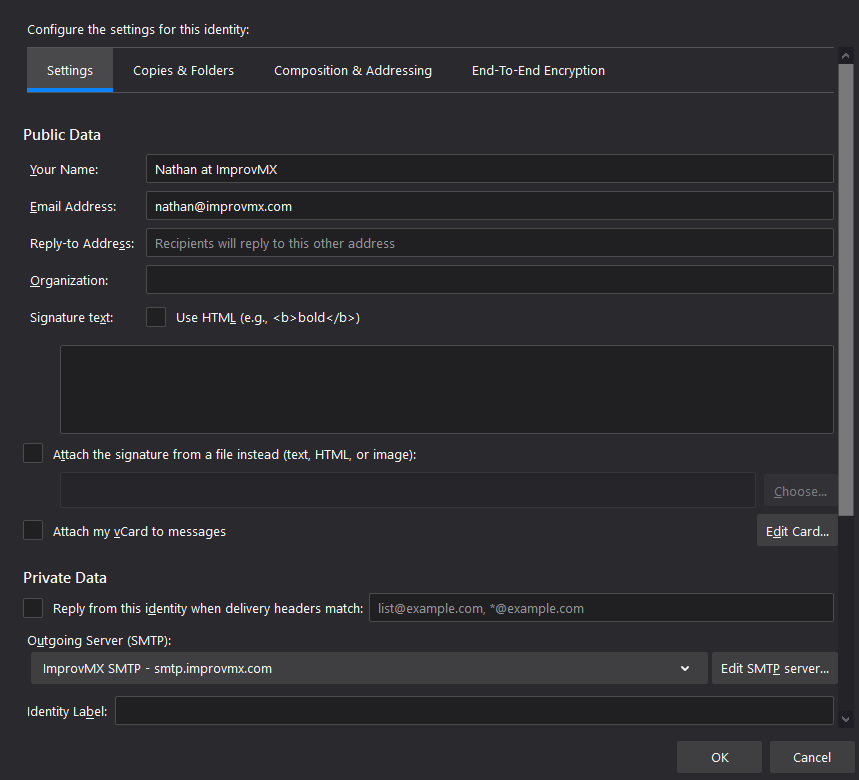
3 ) Add your ImprovMX alias as an "identity".
In your Account Settings, select the account/email address you wish to add the identity and choose Manage Identities... towards the bottom of this page.
Click Add... and fill out the information as per your needs, ensuring that Email Address is your ImprovMX alias, and that the Outgoing Server (SMTP) is utilizing the SMTP server you made in step 2.
Click "OK"
4 ) Send an email from your alias.
Compose a new email and select your ImprovMX alias on the "From" line.
Fill in a valid "To" recipient.
Fill in a test subject and body, and click send.
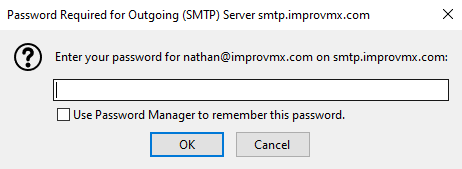
You will now be asked to authenticate your user on ImprovMX. Use the password you created in step 1, and optionally check the box to save the password.
Confirm receipt of the test email!
You should now be able to use ImprovMX SMTP to send from your alias within Thunderbird. Repeat these steps to add additional aliases to your Thunderbird client. If you have any questions or issues regarding this process, please feel free to shoot us a message and we'll get back to you promptly.